Semua tip2 dan post adalah sebahagian yang diambil dari website lain... Himpunan ini bagi menyenangkan bagi saya dan pelawat untuk melihat dan membuat rujukan kembali.. Sekarang masa tidak mengizinkan saya untuk terus berkecimpung dalam penulisan blogger ini.... Bagi mengelakkan kekosongan blog ini sistem copy and paste digunakan... Jika ad orang yang terasa dan marah.... HArap kesalahan boleh dimaafkan.....
(Kemungkinan pada tahun hadapan 2012 akan trus mnrus bergiat sendiri dalam penulisan blogger...INSYA-ALLAH)..... :)
Nasihat

Saturday, 3 September 2011
Sunday, 21 August 2011
5 Tips for Great Landscape Photography
APRIL 20, 2011 · 3 COMMENTS

This post is directed at all the fans of landscape photography, especially at those who sometimes are frustrated with mediocre results and looking for inspiration.
Make best use of the Rule of Thirds
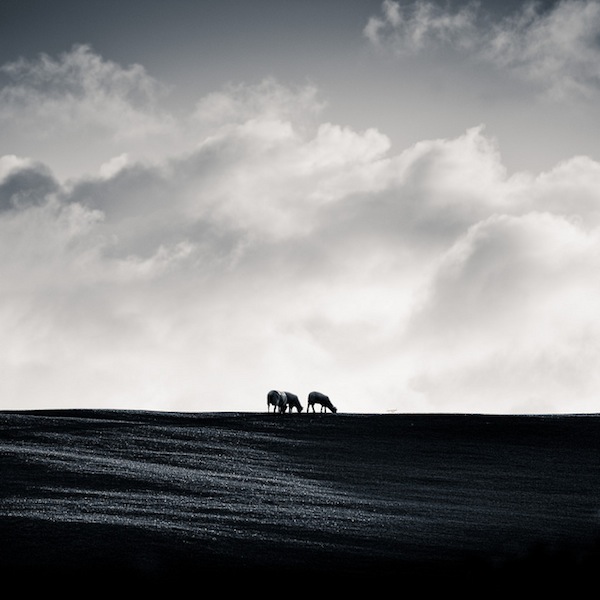
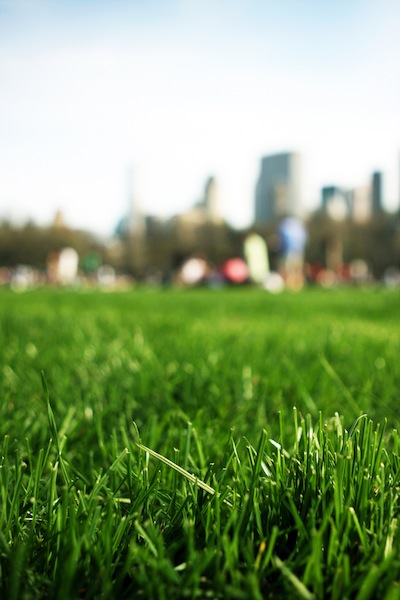
When framing a nice landscape, you should take your time and arrange your camera exactly the way you want, so you can get the best picture out of the object/landscape you’re shooting. The “rule of thirds” basically means that you place objects in your pictures along imaginary lines that divide the frame into nine equal parts. So you should for example place the line of horizon that divides the scenery from the sky in your picture either on the imaginary line in the upper or lower third.
Try to place a foreground object
The human eye is used to search for an object that functions as the “center of interest” of a picture, when looking at landscape photography. By having such an object in the foreground, we can put what we see in relations (regarding size and distances) and are more at ease looking at the picture. For best effect, also use the “rule of thirds” here, move the object out of the center and more towards the sides.
Photo by Atlanticos
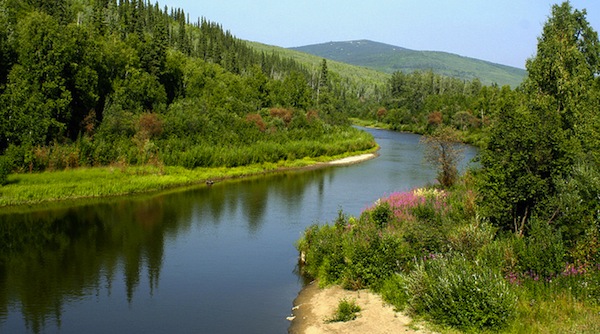
Find interesting geometric formations in nature
Structures tend to catch the viewer’s attention more than just a bland landscape where they don’t really know what to focus on. A very common structure is for example the “Lazy S”, which often occurs in rivers that run out of sight in an S-shaped form. This S-form provides the viewer with a line along which to look at the picture and in a way draws the viewer’s eye into the scene along the river’s shape.
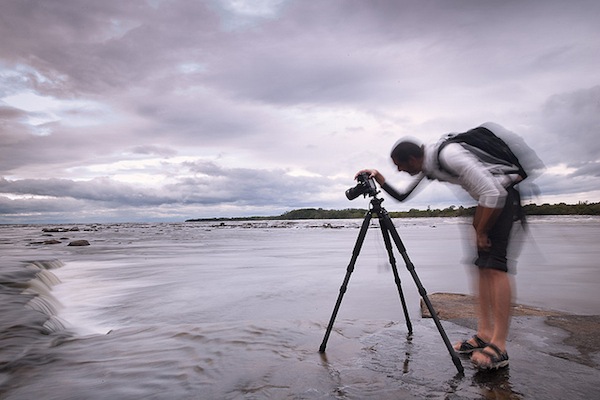
Use a tripod
This one would maybe strike you as an obvious tip, but it surely isn’t one that you should neglect either. A tripod helps you in several ways to get the best out of the landscape you’re shooting. You naturally concentrate more on the framing as the tripod provides you with the sturdiness you need to slowly arrange your camera, whereas handheld landscape pics often give the impression of a snapshot. Also it helps you to take better pictures in low light settings, and take advantage of interesting lighting in general (see below).
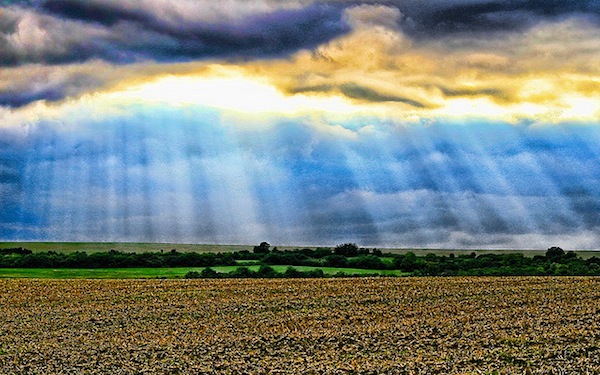
Use a small aperture to create interesting light effects
Smaller aperture (big f-stop number) decreases the amount of light that goes through your lens and hits the sensor (or film) of your camera. Thus light that originates from outside the scenery that you are shooting wouldn’t interfere with the rays of light inside the scenery. That means that the rays of light inside the scenery can appear in layers when for example passing through clouds. The smaller the aperture and ISO are, the better the results. Be sure to use a tripod to provide the needed sturdiness for a shot with very slow shutter speed. You might also want to use a lens hood to further enhance the effect.
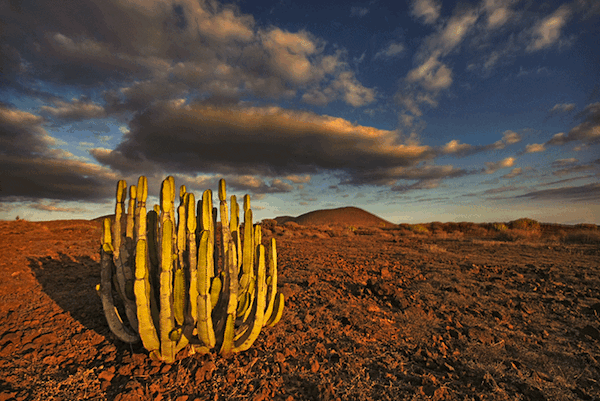
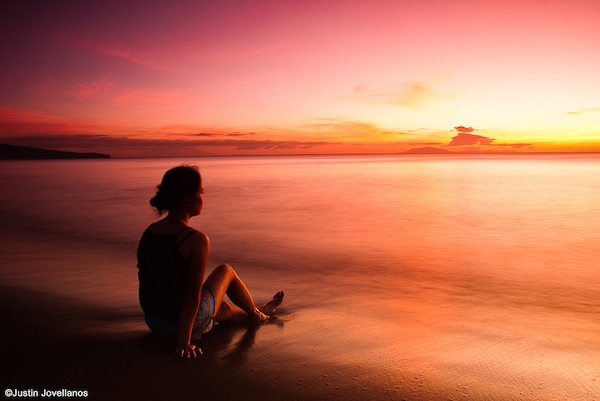
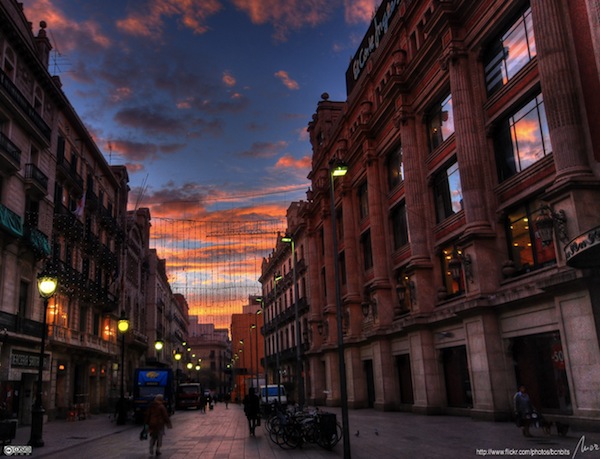
6 Golden Hour Photography Tips- Create Exquisite Photos Without Expensive Lighting
APRIL 13, 2010 · 16 COMMENTS
We all know that not enough lighting can ruin a photo. However, harsh direct sunlight can also a wreck a photo – overexposed, too much contrast, intense highlights and shadows.
Golden hour (aka magic hour) is around the first and last hour of sunrise and sunset. The sunlight during those hours creates soft warm hues, as oppose to the overtly bright tones you’d find during midday.
Don’t be surprised to find more landscape photographers during golden hours. The sun illuminates buildings and landscapes with a desirable red and orange tint. You’d often notice in films how they also deploy this technique to capture breathtaking scenes of the ocean, countryside or cityscape.
How to shoot during golden hours
1) Check the times of sunrise or sunset in your local area
Don’t just assume. Also check the weather forecast. If it’s very cloudy or there’s a chance of rain, you won’t be able to see the golden hour.
Don’t just assume. Also check the weather forecast. If it’s very cloudy or there’s a chance of rain, you won’t be able to see the golden hour.
2) Arrive earlyDon’t let the name fool you as sometimes you’d have less an hour to capture the photos in the warm tones. Especially during the Winter months. Getting there early means you won’t be rushed setting up your gear or adjusting camera settings.
3) Turn off auto white balance
Manually adjust the white balance to create the color mood you desire. Or, you can also experiment with the auto-presets such as ‘sunny’ or ‘daylight’.
Manually adjust the white balance to create the color mood you desire. Or, you can also experiment with the auto-presets such as ‘sunny’ or ‘daylight’.
4) To light up your subject in the foreground
Set EV (exposure value) to +1, +2 or +3. Alternatively, you can also slow down your shutter speed or use a fill flash.
Set EV (exposure value) to +1, +2 or +3. Alternatively, you can also slow down your shutter speed or use a fill flash.
5) To create a shadow effect with your foreground subject
Set EV to -1, -2 or -3. You can also choose to make your shutter speed faster.
Set EV to -1, -2 or -3. You can also choose to make your shutter speed faster.
6) Use a tripod
You would produce clearer images and capture more vibrant colors.
You would produce clearer images and capture more vibrant colors.
Here are some examples that would hopefully inspire you to get shooting during the golden hours!


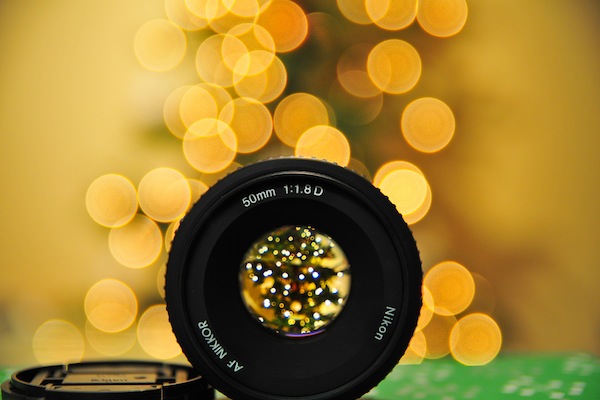
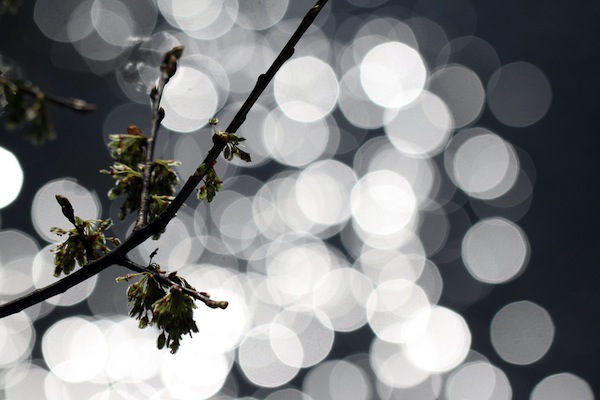
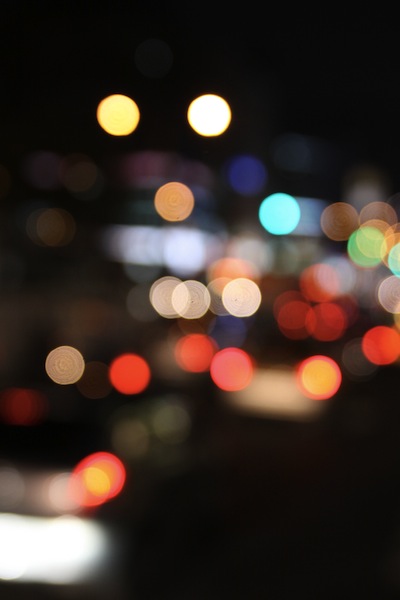
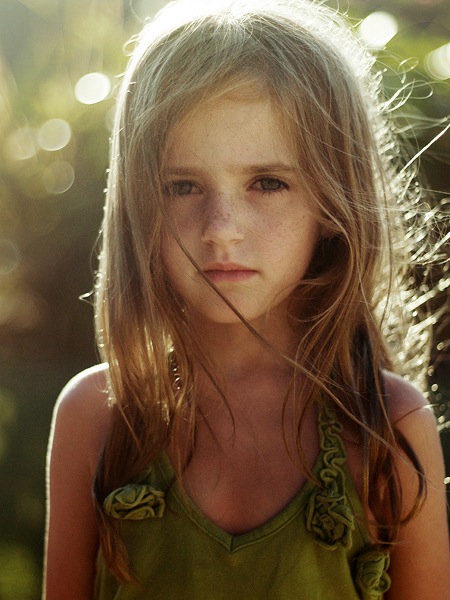
How To: 7 Quick Tips To Create Bokeh With Digital Camera
APRIL 15, 2010 · 33 COMMENTS
Bokeh comes from the Japanese word ‘boke’, which means fuzzy. In photography, bokeh defines the quality of the blurred lights presented in a photo. We’re not referring to a badly taken photo that’s all out of focus, but rather the aesthetically pleasing background blur. Usually, this type of blur highlights the focused subject even more.
Producing nice bokeh involves creating a shallow depth of field.
Here are some tips to get you started with bokeh photography:
1.) Larger aperture works best, so use a low f-stop number like f1.4, f1.8 or f2.8. I like using theCanon 50mm f1.8 or the 35mm f1.4 for this project.
2.) Set your camera to aperture priority.
3.) You would need to set the shutter speed faster than 1/50 second. Any slower and I find the background lights getting blurred together, instead of rendering small circles. If it’s too dark, increase the ISO level rather than the f-stop number.
4.) The closer you get to subject, the better. If you’re using a zoom lens, extend it to the longest focal length.
5.) The further away the background, the better.
6.) Ensure that the background is lit. Glowing lights like street lamps and traffic lights work best. While a consistently lit background would just create a regular blur.
7.) If you don’t have a subject and want to create the bokeh effect with the night lights, manually focus your camera.
Get inspired by the photos below and show us your best bokeh shots!


Kulio’ou’ou by da_godfaddah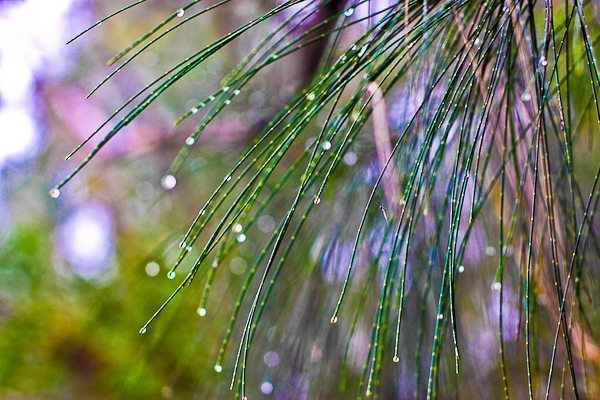

Aeia Loop by da_godfaddah
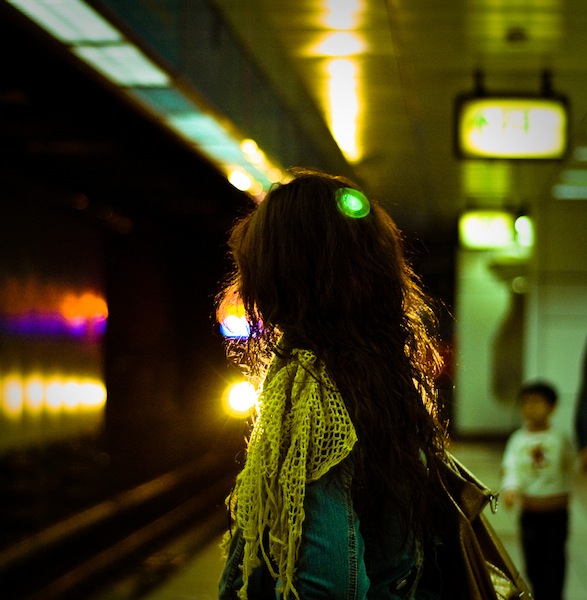
5 Steps to Achieve Panning in Photography
SEPTEMBER 21, 2010 · 8 COMMENTS
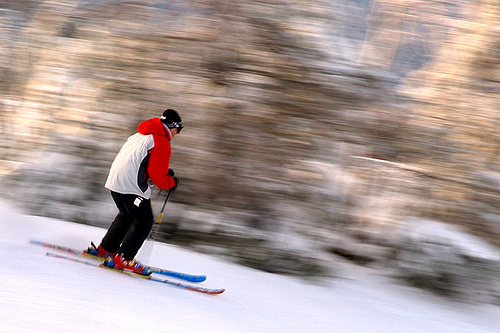


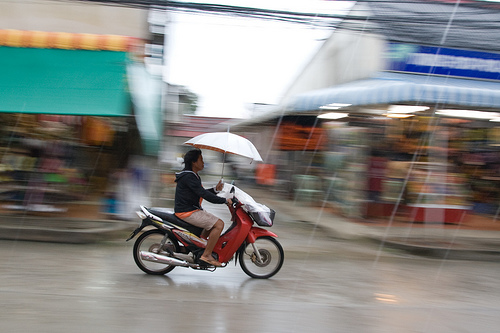
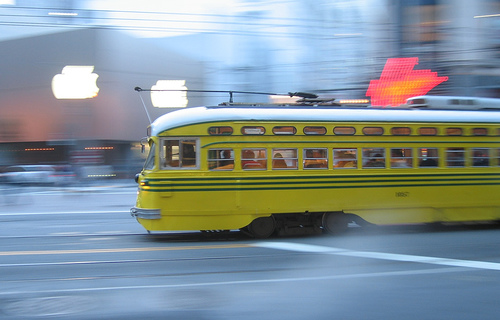
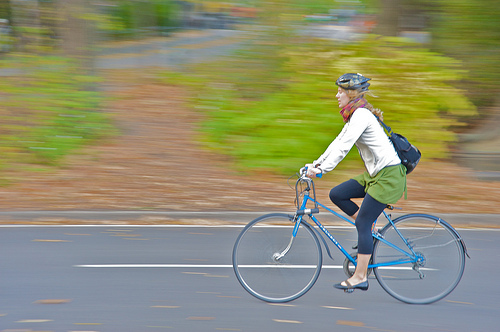
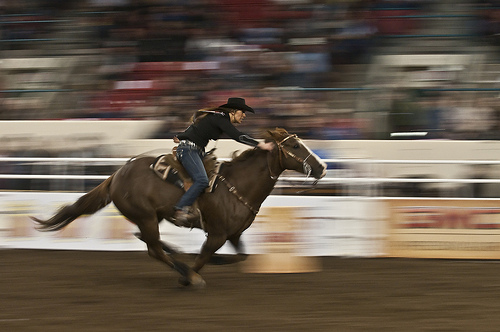
In photography, panning refers to moving the camera horizontally. With a bit of practice, you can achieve some amazing results. For example, the subject of the photo might be crisp and still, but the background is blurred with motion lines.
Photo thanks to Chaval Brasil
I must admit, this isn’t the most easiest photography technique to master. However, it’s a fun one to do and requires a bit of patience, energy and lots of trial and errors.
This post was suggested by one of our Photoble readers Dahuang, who has been curious over panning in photography. If you have a suggestion, please let us know on our blog or our Facebook page. We read and do our best to respond to all comments. 
1.) Choose a moving subject
For this project, it’s probably best to head outside as you’d have a wider selection of moving subjects. Best to start off choosing a subject that’s moving at a slower pace and in a straight line, like someone strolling or a car slowing down at an intersection. Once you get the hang of panning, you can choose faster subjects like moving cars, bike riders, running dogs or even roller coasters.
2.) Designate a Shoot Point
Choose a landmark or an object so that when your subject passes this point, it’s when you would hold down the shutter to shoot. The point could be a tree, pole, shop window or a marking on the road.
3.) Set the Shutter Speed
Before you start shooting, set the shutter to a slower speed like 1/30 or 1/60 so that there would be motion blurs. Play around with it as you might find yourself adjusting the shutter speed even slower. Nevertheless, on the slower end (e.g., 1/8) you will find your subject being slightly blurred too.
Have your camera mode on Tv (shutter priority). Don’t worry too much about the aperture as the background would be blurred anyways.
4.) Focus Tracking
It’s very important that your subject is in focus. You might like to switch focus to AI Servo mode (in Canons) or AF-C mode (in Nikons). In this mode, hold down your shutter half way to lock focus on your subject. Without letting go of the shutter, start following your subject with your camera at the same speed. Your camera would automatically adjust focus.
5.) Shoot!
When your subject passes your designated shoot point, fully press down on the shutter while still following the subject. For smoother horizontal movement and clearer focused subject, use a tripod on level ground. Your main subject might never be super focused and clear, but panning is about creating that contrast. Your subject will be focused relative to the blurred background.
Photo thanks to Scott Ableman
Photo thanks to blentley
Photo thanks to zoutedrop
Photo thanks to raindog
Photo thanks to Ed Yourdon
Photo thanks to __Olga__
Photo thanks to gibbyson4
Do you have any examples to show us? Or have another tip to add? Comment below! If you liked this post, you might also like our inspiration post on motion blur
20 Shots: Long Exposure Photography Examples
in INSPIRATIONLong Exposure Photography is very popular technique for photographers at different sills levels. Everybody can find something interesting and unique in the process of doing long exposure shots and outcome sometimes surprises yourself.Here are twenty great long exposure photography examples, hope you will find them inspiring!1)Ludicrous Tree by DanDeChiaro 2) Smoke on the water, fire in the sky by cactusmelba
 3) Noche de nubes magicas by ⓢⓐⓒ
 4) November light at night by Kristian M
 5) Rocks, Moss, & Water by Martin Cathrae
 6) Wiesn 2009 – Turning caroussel by meironke
 7) Heavens Above by Mozzer502
 9) Caged by Pro-Zak
 10) Ithaca Falls – HDR by Pro-Zak
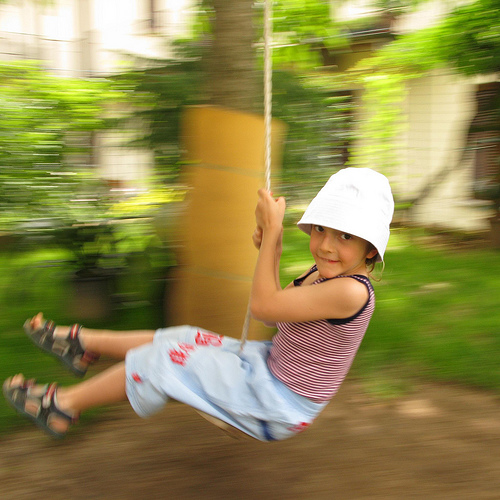
 11) Swing +3 by auburnxc
 12) The weir by Horrgakx
 13) Narrow streets of cobblestone by janusz l
 14) Siempre igual, siempre diferente by Joseeivissa
 15) Llandulas, North Wales by Manky Maxblack
 16) November Dawn by midlander1231
 17) Steel worm by mugley
 18) Eye by orangebrompton
 19) Moonlit Frosty Winter Oak by Sigurd R
 20) Turimetta Motion by TimboDon
Here are twenty great long exposure photography examples, hope you will find them inspiring!
1)Ludicrous Tree by DanDeChiaro
2) Smoke on the water, fire in the sky by cactusmelba
3) Noche de nubes magicas by ⓢⓐⓒ
4) November light at night by Kristian M
5) Rocks, Moss, & Water by Martin Cathrae
6) Wiesn 2009 – Turning caroussel by meironke
7) Heavens Above by Mozzer502

9) Caged by Pro-Zak
10) Ithaca Falls – HDR by Pro-Zak
11) Swing +3 by auburnxc
12) The weir by Horrgakx
13) Narrow streets of cobblestone by janusz l
14) Siempre igual, siempre diferente by Joseeivissa
15) Llandulas, North Wales by Manky Maxblack
16) November Dawn by midlander1231
17) Steel worm by mugley
18) Eye by orangebrompton
19) Moonlit Frosty Winter Oak by Sigurd R
20) Turimetta Motion by TimboDon
Subscribe to:
Posts (Atom)